Saturday, August 8, 2009

Fred's brownies

When I was working in Amsterdam at the local television station, I had a sweet colleague from the US. Once he treated the whole floor to brownies and a huge New York cheesecake. Both were delicious. On request he gave me the recipes, and just now (years later) I finally made the brownies. Why did I wait that long? They were yummy yummy yummy. So please try them if you are in the mood for something very chocolaty, fudgy, smeary and yet crunchy.


Fred's brownies

230 g butter
225 g dark chocolate (70% cacao), roughly chopped
125 g flour
1 teaspoon baking powder
1/2 teaspoon salt
380 g sugar
4 eggs
2 teaspoons vanilla extract
140 g walnuts, roughly chopped

* preheat the oven to 175 C
* grease a baking pan that is around 25x30 cm (or a little bit bigger or smaller) and then line it with two sheets of baking paper. also grease the top layer of baking paper. the paper can stick out some centimeters on the top to prevent the brownie mixture to overflow
* melt the chocolate and butter in the microwave at 350 watt, stirring each 30 seconds until completely melted
* in a bowl, stir together the flour, baking powder and salt
* in another, large bowl, whisk the sugar with the eggs and vanilla extract until fluffy and white
* pour in the melted chocolate/butter mixture while stirring, and then add the flour mixture. continue stirring from the edges of the bowl to prevent lumps
* when all is mixed, stir in the chopped walnuts
* pour the mixture into the baking pan and place in the oven for around 40 minutes, the top should be shiny and edges should curl up a little
* let it cool down completely on a rack (yes, this is the hard part!), be patient.
* flip it over carefully and remove the paper. cut into squares and enjoy.

The brownies will taste even better the day after, so make them in advance, or try to save some for the next day.

Thanks Fred!

Monday, August 3, 2009

Ratatouille - French zucchini and tomato stew

Excuses, excuses. Plenty of those. I do apologise for my absence the last month. I will not bore you with the reasons, but instead treat you to a new recipe. A very summery dish this is, and while eating you will think you are somewhere in France. I do anyway.
You can eat ratatouille, of course, the day you make it. I usually eat it with some wild rice.
But make sure to make some extra ratatouille and eat that the next day. Preferably lukewarm on a piece of French bread (baguette). Let it stand for 10 minutes and enjoy. I read this tip on another blog somewhere and I can really recommend it.
By the way: buy your zucchini on the small side. They usually have more flavour than the larger ones.
The recipe for this ratatouille is without aubergine. My man doesn't like it, and I'm not too fond of it either, so I skip it even though it's quite a traditional ingredient for a ratatouille. If you do like to put in some, well, then be my guest.


Ratatouille (serves 4, or two times two)

olive oil
1 large onion, chopped
3-4 cloves of garlic, finely chopped
2 stalks of celery, chopped
2 carrots, chopped or finely sliced
3-4 zucchini (NL: courgette), halved and cut in 1-cm slices
10 tomatoes, coarsely chopped or 2 cans of tomatoes
1 teaspoon of sugar
1/2 glass of white wine
2 bay leaves (NL: laurier, S: lagerblad)
1 teaspoon of dried French herbs
salt and pepper

* heat the oil and add the onion, garlic, celery and carrots
* let this soften up for 10 minutes - it should not get brown, just soft
* add the zucchini and fry for 2 minutes
* add the tomatoes and sugar and turn the heat up
* break the tomatoes by cooking them on a high heat while stirring often
* after 5 minutes you can lower the heat and add the wine, bay leaves and herbs
* leave to simmer for 30 minutes or longer, with the lid of the pan halfway

Another serving alternative: add some fried sausages, cut in slices and boiled potatoes to turn it into a more meaty and hearty stew (S: Fransk korvgryta).

Thursday, July 2, 2009

Summer strawberry cake

Before the thunder and lightning struck on Midsommar, we had a lovely lunch outside. Three different types of herring (very traditional); warm smoked salmon with a horseradish cream; a smörgåstårta or 'sandwich cake' with salmon and crayfish; Swedish strong cheese; dark bread and of course knäckebröd. No potatoes, as you could read in my last post.


And then the pièce de resistance: a strawberry cake, with lots of fresh strawberries and filled with strawberry mousse. I will give you the recipe for this cake now, as the strawberries are still in season and rather cheap.


Strawberry cake (adapted recipe from Dagens Nyheter)

Step 1
Mousse: (can be made 2-3 days in advance)
4,5 sheets of gelatin
200 g strawberries (not more or less)
4 dl cream
0,75 dl sugar
2 teaspoons vanilla sugar

* cover a springform (24 cm in diameter) with plastic foil. It's important that the filling will not leak, so make several layers of foil and press it down gently along the edges
* let 4,5 gelatin sheets soak in cold water
* purée the strawberries with a blender
* put the puréed strawberries in a pan, together with 4 dl cream, 0,75 dl sugar and 2 teaspoons of vanilla sugar
* bring to the boil and then take the pan of the heat
* take the gelatin sheets out of the water and shake excess water off
* put the gelatin sheets in the pan and stir until the sheets have dissolved
* let the mixture cool down for 5 minutes and then pour it into the prepared springform
* let it stand for 30 minutes and then place it in the fridge
* it needs to stiffen up in the fridge for at least 4 hours

Step 2
Cake: (can be made 1 day in advance)
100 g butter
3 eggs
2 dl sugar
180 g flour
1 teaspoon baking powder
pinch of salt
1 tablespoon of vanilla sugar
1,5 dl milk
some good strawberry cordial (NL: siroop, S: saft)

* preheat the oven to 175 C
* use a springform the same size as the mousse. Cover the bottom with baking paper and grease the form
* melt 100 g butter
* in a bowl, mix 3 eggs together with 2 dl sugar until fluffy
* while stirring, you can bit by bit add 180 g flour, 1 teaspoon baking powder, a pinch of salt, 1 tablespoon of vanilla sugar, 1,5 dl milk and the melted butter
* pour the mixture into the springform and bake for 40-45 minutes
* when the cake has cooled down, take it out of the springform.
* using a sharp bread knife, cut the cake horizontally so you have two cake halves
* sprinkle both halves, on the cut side, with some cordial

Step 3

Take the mousse out of the fridge and, with a steady hand, flip the mousse on top of one half of the cake. Place the other half on top it. Cover the cake with some foil, and put in the fridge. This is best done the day before serving, so that the flavours can be soaked into the cake.

Step 4 - just before serving
2 dl cream
250 g strawberries
icing sugar

* whip the cream, but not too stiff
* clean the strawberries
* using a spatula, spread the whipped cream on all sides of the cake
* place the strawberries on top and dust with some icing sugar


This cake is quite a lot of work, but it tastes heavenly and looks spectacular (or so I think). If you really want to make something special, then let this cake be it. The good thing is that most is done in advance, so you don't need to do much before serving, which is nice when you have guests!

Saturday, June 20, 2009

when lightning strikes...

We had the most wonderful Midsommer. I made a big lunch with three types of herring, smörgåstårta, warm smoked salmon with horseradish sauce and much more. To drink there was beer and wodka - very traditional here in Sweden! My family came over from Holland (except my dear sister) and my parents had the task of cleaning the new potatoes...when they finally cleaned and boiled them, we forgot to put them on the table. Oh well, they made a nice potato salad to accompany the barbeque in the evening.
After lunch we had coffee with a strawberry cake and then we headed into the village to see the singing and dancing around the pole. The sun was shining, we were drinking beer and cider and finally I dared to join in for the last song. Suddenly the sun hid herself behind some clouds and we decided to slowly walk back home. A few minutes later it turned dark and a big thunder storm started. That hardly ever happens here, so I rather enjoyed it! When we were just inside our house, taking off our wet clothes and talking about how nice everything was - I saw a bright light and heard a loud bang. I thought there was some firework going on or something, but it was lightning that struck our house! That was quite scary and it actually burned our modem and router. So we have lost all our connection to the world, since we lost our internet connection.

I am writing this post after a fabulous dinner at M.'s grandmother's house, where we all were invited. I am writing to let you know that we will try to fix the internet as soon as possible, but you will have to wait a few days for a new recipe. But those recipes are worth waiting for, I can tell you that!! We had some good meals in that little wooden house in the forest and I can't wait to share the recipes with you...just a little patience please.

Saturday, June 13, 2009

Apple and pear crumble

Now, my dear readers, it is time for something sweet. Something very simple and yet so good. I made this cake a few days ago for two friends who stayed with us for a few days. I didn't plan to make a dessert, as we had been eating so much during the course of their stay, but in the end I couldn't resist and threw some things together. They loved it (or so they said) and I can really recommend this recipe if you want to make something fast and easy. If you've never baked a cake before, then try this one!


Apple and pear crumble (serves 8)

3 small apples
1 ripe pear
lemon juice (fresh or from a bottle)
250 g flour
250 g sugar
150 g oats (NL: havermout/ S: havregryn)
200 g butter
3 handfuls of almonds or other nuts

* preheat the oven to 190 C
* peel the apples and pears, and cut them in cubes
* place them in a bowl and sprinkle some lemon juice on them
* put 250 g flour, 250 g sugar and 150 g oats in another bowl
* melt 200 g butter in a pan on low heat and add to the bowl with the flour mixture
* blend it all together with large spoon
* grease a spring cake tin (NL: springvorm)
* put two thirds of the pastry in the tin and use a spoon to press it down a bit
* place the apple and pear mixture on top
* chop 3 handfuls of almonds coarsely and sprinkle on top
* sprinkle the rest of the pastry mixture on top (it should be crumbly)
* place in the oven for 60 minutes, until brown
* leave to stand a little before cutting

Serve with some whipped cream, or vanilla ice cream (yes, or both). It's best served warm, but will also taste great the next day with a cup of coffee.

Wednesday, June 10, 2009

Roasted red soup

I have a few recipes for you, waiting to make an appearance here on the blog. A soup; a healthy plate and a simple, but delicious dessert with nuts, apples and pears. What shall I share with you first? Perhaps the soup. I have made it a couple of times, and have the original idea for it from this website. Have a look there if you like healthy and vegetarian food.
The flavour of the roasted vegetables in this soup is really great.


I added a little twist to the recipe by putting in a little anchovies and I have replaced the vegetable bouillon for fish bouillon - but you can keep it simple and completely vegetarian too if you like.

Roasted red soup
(serves 4)

olive oil
5 ripe (grape) tomatoes (NL: trostomaten, S: kvisttomater)
1 large red bell pepper (NL/S: paprika)
4 small onions
5 cloves of garlic
500 ml water
1 cube of fish bouillon (or vegetable bouillon)
optional: 2-3 anchovies
salt and pepper
a few drops of tabasco
freshly grated parmezan

* preheat the oven to 190 C
* grease a baking tray with some oil
* peel the onions and remove the seeds and membrane of the red bell pepper
* cut the tomatoes, red bell peppers and onions in quarters, place them on the baking tray and pour a few tablespoons of olive oil on them
* use your hands to make sure they are all covered by a thin layer of oil and place them skin side down (or in case of the onions - where the skin used to be)
* don't peel the garlic, just put them in a corner of the baking tray
* place in the oven for 45 min, or until the onions are browned a bit on the sides and all the vegetables are soft and cooked
* take the garlic aside and put the rest of the vegetables (including their juices) in a pan
* peel the garlic and add to the veggies
* also add the anchovy, if you are using it. it will add a little bit of extra flavour and saltiness
* in another pan, bring 500 ml water to the boil and add the bouillon cube
* use a hand blender (NL: staafmixer, S: stavmixer) to puree the vegetables and add half of the bouillon. add more bouillon if needed to create the texture you prefer - this will vary depending on how much juice the vegetables are containing
* warm the soup through and add salt and pepper to taste, and a few drops of tabasco
* serve with a handful of freshly grated parmezan

I usually serve this soup as a starter. It's really great when you have pasta as a main course, because this way you still get your portion of vegetables. Smart, huh.
Of course you could serve it for lunch as well, perhaps with some garlic bread.

Friday, June 5, 2009

Bruschetta con funghi

I wanted to make artichokes with basil butter as a starter for the girls. In the supermarket though, I found that the artichokes were way too expensive. So, when I saw they had a nice assortment of mushrooms and some ripe tomatoes, I decided to make two types of bruschetta instead. The recipe for the bruschetta con pomodori you already got and now I will tell how I made the bruscetta con funghi. It was delicious by the way!


Bruschetta con funghi

olive oil
2 cloves of garlic, thinly sliced + 2 cloves of garlic
300-350 g mixed mushrooms (I used oyster, shiitake and ordinary mushrooms), roughly sliced
4 slices of rustic bread
1 tablespoon of butter
handful of flatleave parsley, chopped

* heat the oven to 200 C
* heat the oil and add the garlic and mushrooms
* stir fry on a medium heat for 10 minutes
* in the meantime, roast the bread slices for 10 minutes in the oven, or fry them in a pan
* cut 2 cloves of garlic in half and rub the bread with the garlic
* back to the mushrooms: add 1 tablespoon of butter and 1 handful of chopped parsley and raise the heat for a minute
* then spoon the mushroom mixture onto the slices of bread
* have a good glass of dry white wine to go with it!

Tuesday, June 2, 2009

Bruschetta con pomodori

So, finally that bloody thesis has been handed in. What a joy and what a relief! To celebrate I had a dinner with my friends. I made some bruschetta as a starter, one with mixed mushrooms and one with tomato.


After that we had Parmigiana di Melanzana (an oven dish with aubergines and parmezan), with tagliatelle and a salad. Finally we had a glass filled with layers of marinated strawberry, vanilla cream, curd and meringues. And a lot of wine with all the courses, naturally.


Bruschetta con pomodori (4 servings)

4-6 tomatoes, chopped
2 cloves of garlic, finely chopped + 2 cloves of garlic
2-3 tablespoons of olive oil
juice of 1/4 orange
1/2 teaspoon sugar
handful of basil, shredded
4 slices of rustic bread
salt and pepper

* put all the ingredients in a bowl and leave to stand for 30 minutes or longer
* heat the oven to 200 C and roast the bread slices for 10 minutes, or fry them in a pan
* cut 2 cloves of garlic in half and rub the bread with the garlic
* with a spoon, take some of the mixture, making sure to leave as much juice behind in the bowl as possible. Spoon the mixture on the slices of bread.

Make sure to use ripe tomatoes. I added a little orange juice, which tasted great and gives a slight twist to this classic Italian dish.

Wednesday, May 27, 2009

It's all about the carrot soup

I think I am nearly done with my thesis...I have to read it again to make sure, and then print it and hand it in tomorrow - and then I am really done. Can't wait for the moment when that that stack of papers, with a thud, lands on the bottom of my professor's post box at university. It will be a burden of my chest and a load of my back! But I'm not there yet, congratulate me tomorrow! I plan to cook something festive then, to celebrate with my friends that we have made it.
But for now a very simple recipe for a simple, but beautiful soup. Carrot and parsley are friends, that you can taste. Some orange and a hint of onion enhance the flavours of carrot and round it off. This soup is very pure and fresh. No coriander or cumin, which I also love, because those strong flavours take over. In this soup the star is the carrot and it shines in all its glory!


It's all about the carrot soup (serves 4)

sunflower oil or butter
1 large onion, diced
800 g carrots, sliced
1 L water
2 cubes of vegetable bouillon
150 ml orange juice
a few handfuls of flat leaf parsley, chopped
crème fraiche or sour cream

* fry the onion in some oil or butter for 1 minute and add the sliced carrots. continue to cook for 1 minute
* add 1 L of water and 2 bouillon cubes and bring to the boil
* boil for about 15 minutes, until the carrots are tender and you can easily pierce them with a fork
* take the pan of the heat and use a hand mixer (NL:staafmixer) to puree the mixture into a smooth soup
* stir in 150 ml of orange juice and bring back to the heat for a few minutes, so the flavours can blend together
* serve with a lot of fresh parsley and a good dollop of crème fraiche or sour cream

Monday, May 25, 2009

Rhubarb tart

To be honest with you: I never really had any rhubarb in my life up until now. I think I would remember - it has such a distinct flavour.
When I saw the first rhubarb coming into the supermarkets here a little while ago, I started thinking and reading - how to make a nice pie with that interesting ingredient. In the end I came up with this, and I think it's just really good. I love rhubarb! The tartness of the rhubarb contrasts the sweetness of the sugar, combined with a crispy pastry and served with cream...yummy. This is a beautiful dessert that is not too heavy or sweet.


Rhubarb tart (serves 8)

300 g puff pastry (NL: bladerdeeg, S: smördeg)
500 g rhubarb (around 6 stalks)
100 g sugar
1 tablespoon water
1 tablespoon potato flour
some flour for rolling
1 egg yolk
to serve: 2 tablespoons of creme fraiche and 1 teaspoon of sugar per person

* put the oven at 200 C
* defrost the puff pastry. You can use a little more or less, depending on the size of the puff pastry sheets, it doesn't really matter that much
* wash the rhubarb and cut the stalks in 2-3 cm pieces
* put these in a pan with 100 g sugar and 1 tablespoon water and let this cook for 10-15 minutes, stirring every now and then
* take the pan of the heat and stir in a tablespoon of potato flour
* place the sheets of puff pastry on top of each other and sprinkle your work surface with some flour
* roll your pastry, with a rolling pin, to a disc with 20-25 cm in diameter
* line a wire rack with baking paper and place the pastry on it
* take a sharp knife and cut a circle, around 2 cm from the edge. Make sure not the cut to deep, just make an incision.
* whisk the egg yolk lightly with a fork and use this to brush area outside the circle - make sure not to put any egg yolk inside the incision
* take a fork and pierce the area inside the circle. Just make rows of little fork holes, with around 1 cm in between
* at this stage you can put the pastry in the fridge for half an hour to get a more crispy base, but you can skip this step if you want (I did and it still tasted great)
* put the rhubarb mixture in the area inside the circle, spreading it out until 1/2 cm before the incision circle, so it really doesn't get inside the incision.
* put the tart in the oven for 20-25 minutes, until the crust is golden brown
* take it out of the oven and let it cool down before cutting
* serve with lightly sweetened creme fraiche (stir 1 teaspoon of sugar into 2 tablespoons of creme fraiche per person), or with some whipped cream and maybe some vanilla ice cream, or some warm custard..mmm. I think I am going to take another slice now.

Wednesday, May 20, 2009

Raspberry and banana muffins

Writing the introduction and conclusion to your thesis seems to be the easy part, but it's not! I've been staring at the screen for a few hours now, until I decided to just forget about it and bake some muffins instead. I kind of hoped they would give me some inspiration, but here I am again, in front of the screen, staring at the same letters and words. Oh, well. At least they tasted really good!


Raspberry and banana muffins (makes 6)

80 g butter
2 eggs
100 g sugar + 1 teaspoon
100 g flour
1 teaspoon baking powder
2 handfuls of muesli
1 ripe banana, squashed with a fork
6 muffin cases
12-18 raspberries (NL: frambozen) frozen or fresh

* preheat the oven to 200 C
* melt the butter in the microwave on the lowest heat
* whisk the 2 eggs with 100 g sugar until fluffy and white
* add the 100 g flour, 1 teaspoon baking powder, 2 handfuls of muesli and the squashed banana and stir with a wooden spoon to mix the ingredients
* leave some lumps: it's good for the muffins, and don't stir too long either
* place your muffin cases in a muffin pan (if you have one) and fill the muffin cases half way up using a spoon
* put 2 or 3 raspberries on each muffin and sprinkle a little sugar on top
* place in the oven for 20-25 minutes, until the muffins are golden brown

I used extra large muffin cases, and made enough filling to spoon them half full. Use medium sized cases, or make 4 muffins instead if you want the muffins to pop a little over the edge. Never fill the cases more than 3/4 though, as the muffins will rise in the oven.

By the way, I think these muffins are great to take on a picknick or to the beach as a little snack!

Monday, May 18, 2009

Ćevapčići - bbq skewers

This weekend I tasted summer. The weather was great and we had our first barbecue of the year. M. had invited his fellow graduates to celebrate. In Sweden it is custom with barbecues that every one brings their own food and you share a little. The host provides the basics, such as a salad, some bread and maybe some sauces.
Since I had to work on the day of the barbecue I couldn't make and prepare as much as I wanted, but I made a few things anyway. The evening before I prepared some ćevapčići. When I came home on the day of the barbecue H. proposed to help me and together we prepared a huge salad, roast potatoes (recipe on my blog here) and tsatsiki, while talking about all kinds of things. It's such a nice thing to cook together! She brought some fantastic cookies by the way, for which she promised me the recipe. I'll make them and post about them later!


Ćevapčići (makes around 10 skewers)

sunflower oil
1 onion, chopped
4 cloves of garlic, finely chopped
1 teaspoon Vegeta or salt
500 g minced lamb
500 g minced beef
1 egg white
1 tablespoon paprika (NL: paprikapoeder)

* heat the oil in a small frying pan and add the onion and garlic and sprinkle with 1 teaspoon of Vegeta or salt
* fry on medium low heat for 5 minutes, until the onion and garlic are soft and getting some colour (adjust the heat so they don't get brown)
* put the egg white in a large bowl and whisk it a little with a fork
* add the minced lamb and beef, the paprika and the onion and garlic mixture
* mix all this together with your hand (I always use one hand to do this, so the other hand can hold the bowl and stays clean for sudden phone calls or a sudden itch)
* slightly wet a tray or plate (I needed two plates), as this prevents the meat from sticking
* for the same reason prepare a small bowl of water to dip your hands in before rolling each little roll
* make rolls of around 2 cm thick and 5 cm long and put them on your prepared tray or plate (yes, now you need two hands, so let that phone ring and ignore those itches)
* cover with plastic foil and place in the fridge for an hour, or overnight, so they don't fall apart
* soak wooden barbecue pens in water for at least 30 minutes, so they don't burn
* make kebabs by sticking the 4 rolls onto a stick, not through the length, but through the sides of the rolls (see picture)
* roast on the barbecue until they are done, 5-10 minutes (they should not be red or pink in the middle)

I really liked these and so did everyone else (or so they said) - I can really recommend them!

Prijatno (eat well)!

Friday, May 15, 2009

Omelet with mushrooms and cheese

This omelet is really easy to make and done in less than five minutes. And it tastes great!

A tip to make a good omelet, that I have gotten from my 'aunt-in-law', is to melt a little butter and mix this with the eggs before frying. Another one is to make sure some air gets under the eggs when they are in the pan: lift the eggs up carefully with a spatula and let the runny part off the eggs get under the part that has already began to form an omelet. Here's my recipe:


Omelet with mushrooms and cheese (serves 1)

2 eggs
1 tablespoon of water or milk
pinch of salt
1 1/2 tablespoons of butter
5-6 mushrooms, in slices
handful of grated cheese
3-4 sprigs of chives (NL: bieslook), finely chopped or cut with scissors

* mix the eggs in a bowl with 1 tablespoon of water and a pinch of salt
* melt 1/2 tablespoon of the butter in a small frying pan
* stir the melted butter into the egg mixture
* melt 1 tablespoon of butter in the frying pan and fry the mushrooms on medium high heat
* when they have become brown and soft you can add the egg mixture
* leave the heat on medium high
* use a spatula to carefully lift up the sides of the omelet, so the runny part of the eggs can get under the thickened part
* when most of the omelet has formed, but there is some moist left on the top, sprinkle the cheese on and fold the omelet
* fry for another 30-60 seconds and slide the omelet onto a plate
* sprinkle some fresh chives over the top

This omelet is great for lunch. But with some salad and bread it makes a nice and quick evening meal as well!

Wednesday, May 13, 2009

Asian style vegetables with noodles or rice

Last weekend I made, with the help and assistance of some friends, a delicious risotto with green asparagus, mint and lemon. With all the wine we were drinking during the cooking, I completely forgot to take a picture. So, I will have to make the risotto again (which I totally don't mind, it was that good) and post the recipe wíth pictures some other time. The recipe was Jamie Oliver's, so if you want to make it before I post it, check his website!

The days have gone by and finally I am posting a new recipe. This is because I only have one week left before I have to hand in the first draft of my thesis...Aaargh! Luckily the stress, as it usually does, has a positive effect on my creativity, so the writing goes quite well, thank you.

Today I will tell you about a delicious Asian dish. It's little bit sweet and smooth, and very tasty. I wonder how my Chinese friends would like it. Maybe they say it's not Asian at all!
The ingredient list seems quite long, but once you have the stuff for the sauce at home, you can cook a million things with it (or just make this recipe over and over again). I have made a suggestion for which vegetables to use, but you can of course vary as much as you like. You can also add some fried tofu or egg to add some protein.


Asian style vegetables with noodles or rice (serves 4)

sauce:
1 teaspoon sesame oil
1 teaspoon sunflower oil
1 onion, chopped
3 cloves of garlic, finely chopped
60 ml Japanese soy sauce
80 ml sweet chili sauce
2 teaspoons cornflour (NL: maizena)
125 ml water
2 teaspoons grated ginger
1 tablespoon of ketjap manis (sweet Indonesian sauce)

vegetables:
1 medium broccoli, cut in small florets
2 handfuls of snap peas (NL: peultjes) or sugar snaps
1 red bell pepper (NL: paprika), in cubes or slices
150 gr cremini mushrooms (NL: kastanje champignons), sliced
1/4 savoy cabbage, shredded

plus: noodles or rice

* blanch the broccoli and snap peas for 2 minutes in boiling water and rinse with cold water to stop the cooking process
* make the sauce by putting the sesame oil and sunflower oil in a large frying pan or wok
* fry the onion and garlic until they are soft, but not brown
* add soy sauce, sweet chili sauce, cornflour, water, ginger and ketjap manis and let it simmer for a few minutes to thicken
* add paprika, mushrooms and cabbage, cover the pan and simmer for around 3-5 minutes until they are cooked but still crunchy
* add broccoli and snap peas and warm through
* serve with noodles or rice

Tips:
* don't throw away the stalk of the broccoli - peel it and cut into thin slices. Use with the rest of the broccoli.
* you can keep ginger in the freezer and grate what you need straight into the pan. You can do the same with chili peppers by the way!

Friday, May 8, 2009

Grilled vegetable salad

Here is a nice and light lunch for you for the weekend. It's easy and very quick to make, and so very tasty. I bought quite a lot of manchego cheese in Spain. It's a delicious sheep cheese, with a lot of flavour. For this salad you could really use any kind of flavourful cheese. Pecorino would be delicious, but otherwise Parmesan in flakes. You can vary the vegetables as well; try portobello mushrooms or aubergine.


Grilled vegetable salad (serves 2)

1 courgette
1 red bell pepper (NL: paprika)
1 large onion, red or yellow
some salad leaves, eg. rucola, baby spinach
good extra virgin olive oil
balsamic vinegar (around 2-3 tablespoons per portion)
flakes of sea salt
freshly ground pepper
manchego, or other strong cheese

* heat a grilling pan, so it's nice and hot. in the meantime:
* cut the courgette in half and then in 5 mm thin slices (along the length)
* cut the paprika in 1 cm strips
* cut the onion in quarters and cut these in half again, so you have 8 parts
* brush the vegetables with enough oil, so they are all coated with a thin layer (you can also do this with your fingers)
* place veggies into the hot pan and keep turning them over
* lower the heat a little bit, so they won't burn
* place the salad leaves on a plate, sprinkle with a little bit of oil and arrange the vegetables on top
* drizzle over a little balsamic vinegar and salt and pepper
* put some flakes of cheese on top
* and have a nice glass of cold white wine with it!

Wednesday, May 6, 2009

Mexican tortilla envelopes with salsa

Andalusia was, in one word, amazing. No, I need more words. It was amazing, beautiful, fantastic. Warm, colorful and festive. The food was so good, and so were the wines. The best of all was the company: my mother and sister. We made long walks amongst black pigs and thousands of wild flowers; climbed the steps of ancient castles; stared at thousands of women in traditional flamenco dresses at the Sevilla fiesta and finally got a bit burned in our bikini's on the beach.

We ate tapas almost every day. A lot of meat and fish, so I thought to make something vegetarian tonight. Not with a Spanish, but with a Mexican twist.


Mexican tortilla envelopes (serves 4)

sunflower oil
1 onion, cut in thin slices
6 cloves of garlic, finely chopped
1 red chili pepper, seeds removed and finely chopped (or keep the seeds if you like it more spicy)
1 red bell pepper (NL:paprika), chopped
1/2 teaspoon ground cumin
1/2 teaspoon chili powder
1 teaspoon dried oregano
1 400 g can kidney beans
1 340 g can corn (NL: mais)
handful of fresh coriander, finely chopped
2 tomatoes, chopped
1 teaspoon salt
8 tortilla's, the smaller ones, around 20-22 cm in diameter
100 g grated cheese, eg. Gouda or Cheddar
a little bit of oil for greasing

* fry the onion, garlic and chili pepper in a large frying pan or wok on a low heat until soft
* add the red bell pepper and 1/2 teaspoon cumin, 1/2 teaspoon chili powder and 1 teaspoon oregano and fry for two minutes
* rinse the kidney beans in a colander (NL: vergiet) and drain the corn
* add the beans and corn to the pan and fry for a few minutes more
* preheat the oven to 200 C
* take the pan off the heat and let it stand for 5 minutes
* stir in the chopped coriander, tomatoes and 1 teaspoon salt
* line a baking tray with baking paper and grease with a little bit of oil
* place the tortilla's on your work surface and put a few spoons of the mixture in the middle of each of them
* sprinkle a handful of cheese on top
* fold the tortilla's by folding in the sides, then fold in the bottom. take the tortilla in your hand, tuck the mixture down with your fingers, fold in the top and place seam down on the baking tray. be careful not the brake the tortilla's.
* brush the envelopes with some oil
* place in the oven for 15-20 minutes, until they are a bit brown around the edges
* serve as they are, or with salsa, sour cream or guacamole


Salsa
(makes one bowl)

2 tomatoes, finely chopped
1 green bell pepper, finely chopped
1 clove of garlic, finely chopped
1 handful of coriander, finely chopped
2 tablespoons of sunflower oil
1 tablespoon of lemon juice
1 or 2 teaspoons of tabasco to taste
1/2 teaspoon ground cumin
1/2 teaspoon dried thyme, crumbled between your fingers
sea salt
black pepper

* stir all the ingredients together and adjust seasoning (NL: zout/peper) to taste
* serve with Mexican dishes like tortillas and burritos, or with grilled meat

Tip: the seeds and inner membrane (NL: zaadlijst) are the hottest part of the chili pepper. To de-seed a chili pepper, cut off the top part and roll the pepper between your fingers until the seeds come loose. Tap the pepper with the opening down on your work surface until all the seeds come out. This way you don't touch the seeds. Still; wash your hands afterwards and try not to touch your eyes or other sensitive areas - it can really burn!

Friday, April 24, 2009

Butternut squash soup with garlic bread

When you are reading this, I am either on the flight to Madrid, or on the transfer flight to the south of Spain. Or perhaps I am drinking a glass of cold white wine on Malaga airport, waiting for my mum and sister to meet me there. Maybe I am already in our rental car, trying to figure out how to get to our first hotel. It is also very probable that while you are reading the recipe for this nice soup, I am just about into dive into the sea, or that I am meandering the streets of Granada. Who knows!
I'm so much looking forward to see my mum and sister and feel so lucky that I can make this journey with them. While I'll be doing that, you can make this wonderful, colorful soup to brighten your day.


Butternut squash soup (serves 4)

(olive) oil
1 onion, chopped
4 cloves garlic, finely chopped
1 potato, peeled and chopped
1 butternut squash, seeds removed and chopped but no need to peel! (NL: flespompoen)
1 L water
1 bouillon cube, vegetable or chicken
1 teaspoon salt
pepper
1 teaspoon paprika powder
1 teaspoon ground coriander
handful of chopped coriander or parsley
to serve: (Turkish) yogurt or crème fraiche, paprika powder and sea salt

* fry the onion and garlic until soft, but not brown
* add potato and butternut squash and fry for a minute
* add 1 L water and 1 bouilloncube, 1 teaspoon salt, pepper, 1 teaspoon paprika powder and 1 teaspoon ground coriander
* bring to the boil and simmer for 20 minutes, or until the butternut squash is tender
* puree with a hand mixer (NL: staafmixer) until smooth
* stir in a handful of chopped coriander or parsley
* serve with (Turkish) yogurt or crème fraiche, a dusting of paprika powder and some flakes of sea salt

The great thing with butternut squash is that it's not necessary to peel them. And if you've ever peeled pumpkin, you know it's a pain in the ***.

Garlic bread

bread
olive oil
flakes of sea salt
1 clove of garlic, peeled and cut in half

Rub a few slices of bread with a little olive oil and sprinkle some salt on it. Put on a hot grill and turn when it's got some color. When done, rub some garlic on the surface of the bread. This is a very nice way of serving some bread that's not super fresh anymore.

PS: a friend asked if I took all the pictures of the food myself and the answer is YES!

Thursday, April 23, 2009

Tunnbrödsrulle - Swedish wrap with real potato salad

On nearly every street corner in Sweden you will find some sort of a 'gatukök' - literally a street kitchen, where you can buy different kinds of snack food. The most common is a grilled hot dog, optionally served with a prawn salad and roasted onions. It is the weirdest combo, but tastes pretty good - especially at 3 AM in the morning when you are so drunk that you can hardly stand on your legs. This of course never happened to me, and if it did - hey, I'm just trying to integrate with Swedish culture.


Anyway, you can also get Swedish wraps. Much healthier and also easy to make at home. The wrap is made of 'tunnbröd', which is a thin and soft bread. The most common tunnbrödsrulle is served with roast beef and potato salad. I love these, and I happened to have some roast beef left over. I made the potato salad myself: much tastier and you spare yourself from a lot of E-numbers.


Potato salad (serves 4)

500 g waxy potatoes (NL: vastkokend), unpeeled
4 big tablespoons low fat sour cream/crème fraiche
1 big tablespoon mayonnaise
1 teaspoon Dijon mustard
handful of parsley, chopped
3 tablespoons chopped chives (NL: bieslook)
1 red onion, finely chopped

* cut the potatoes in even sized chunks
* boil them in salted water until just tender when pierced with a knife, around 15-20 minutes
* in the meantime: stir 4 big tablespoons of crème fraiche, 1 big tablespoon of mayonnaise, 1 teaspoon mustard, a handful of chopped parsley, 3 tablespoons of chopped chives and plenty of salt and pepper together
* when the potatoes are ready, discard the water and let the potatoes cool down until you can easily touch them
* remove the skins and cut the potatoes in slices of 1-2 cm
* carefully stir in 1 finely chopped red onion and the crème fraiche mixture
* leave to rest in the fridge for at least 1 hour

This potato salad is also great when you have a barbecue and you can easily make a bigger amount. Don't serve it ice cold - take it out of the fridge a while before serving.

Tunnbrödsrulle

To make the tunnbrödsrulle you simple fill a soft bread (or a tortilla; softened in the microwave) with some roast beef, potato salad and rucola. If you want to do it the 'gatukök' way, skip the rucola and add some roasted onions, ketchup and mustard. Roll it up and eat!

Wednesday, April 22, 2009

Oatmeal and raisin cookies

The nice thing with these cookies is that they feel a bit healthy. Of course you know that there is some sugar inside, but it's brówn sugar. Plus: oatmeal is really healthy, right? So dig into these cookies without feeling guilty - they are really good. And as they fill you up with complex carbohydrates, it's an ideal cookie to bring to work, school or a trip.


Oatmeal and raisin cookies
(makes 30)
adapted recipe from Coming Home by John Burton Race

150 g butter, softened
225 g soft brown sugar (I used cane sugar)
1 egg, lightly beaten
2 teaspoons vanilla extract (I only used one teaspoon)
125 g flour
1 teaspoon baking powder
pinch of salt
235 g rolled oats (NL: havermout)
125 g raisins

step 1

* preheat the oven to 180C
* line baking tray with baking paper
* stir the 150 g butter with the 225 g sugar until it's creamy
* stir in 1 beaten egg and 1 teaspoon vanilla extract
* sift (NL: zeef) 125 g flour, 1 teaspoon baking powder and a pinch of salt into the bowl, stirring in between. make sure it's mixed, but don't over stir it
* add 235 g oats and 125 g raisins and stir. I also used my hands to make sure the oats and raisins were well divided

step 2

* roll tablespoons of the mixture into balls and place on the baking tray with 5 cm of space in between
* flatten the balls with a fork dipped in flour
* bake in two batches and put the remaining half in the fridge while the first is baking
* bake the cookies for 20 minutes
* remove from the oven and let them rest for 5 minutes on the baking tray
* transfer the cookies to a wire rack to cool completely (but eat some while they are still warm)

Prawns with homemade mayonnaise

Up until a few years ago I didn't like prawns. In fact, I didn't like anything that could crawl or still had legs, claws or antennas.
Then I started going to this tapas place around the corner of my old house in Amsterdam. I would go there with either my roommate and best friend A. and/or my boyfriend M. Both of them were crazy about the gambas al ajillo. With fascination and disgust I looked at those little animals and watched how they were devoured. The head was jerked off, and then the rest of the skin. Taking the bowels out and then, finally, they could eat this poor little pink thing. Not so appealing, but the smell of garlic and oil..hmmm.
Finally I took a bite. Since then I am sold and now I skin these little mama's without any scruples what so ever.


I also love eating them plain, with some homemade mayo, toasted bread with butter and some lemon juice. Just put everything on the table, and let everybody clean the prawns themselves.
Take 100 g of unpeeled, cooked prawns per person.

Mayonnaise (around 1 cup)

1 egg yolk
1 small teaspoon Dijon mustard
2,5 dl sunflower oil
little bit of lemon juice
salt and pepper

* mix the egg yolk with the mustard with a (electric) whip (NL: garde)
* add just a drop of oil and mix
* add another drop and mix and continue this way until it's getting thick and creamy
* dribble in the rest of the oil slowly while whipping continuously (I tend do it too fast and have to start over - very annoying)
* stir in some lemon juice, salt and pepper to taste


Tips:
* don't use olive oil for your mayonnaise, or use half olive and half sunflower oil, because otherwise the olive oil flavour will dominate the mayonnaise too much.
* make sure all the ingredients of the mayonaise are on room temperature
* you can use frozen prawns if you skin them while they are still frozen. This way they won't get soggy (I got this tip from my 'aunt-in-law' who is a food journalist/writer and great cook)

Monday, April 20, 2009

Moroccan Tomato and Cucumber Salad

Whilst a butternut squash is mixing its flavours with some onion, garlic and coriander to form a beautiful soup, I will tell you about something completely different. The soup's recipe will follow later!

Remember that I made a couscous plate a few days ago? I also made a tomato and cucumber salad that is amazingly good. I think it's the roasted cumin that does the trick, but this salad is really quite special.
The recipe comes from a cookbook that I found in a discount book store in London. I have made several recipes from it and they all turned out deliciously. The book is called Feast Bazaar, by Barry Véra, and is about food from India, Morocco and Syria. A rather strange combination, geographically seen, but it's a great book.


Morrocan Tomato and Cucumber Salad (serves 4)
(adapted recipe from Feast Bazaar by Barry Véga)

1 teaspoon cumin seeds
6 roma (plum) tomatoes (make sure they are ripe and smell good)
1 cucumber
1 red onion
1 green capsicum pepper (NL/S: paprika) (I used a red one instead)
1 handful chopped flat-leaf parsley
4 tablespoons lemon juice
100 ml olive oil
sea salt and freshly ground black pepper

step 1
* heat a frying pan over medium heat and add 1 teaspoon cumin seeds
* dry-roast the seeds for 2 minutes on medium heat, while stirring
* place in a mortar and pestle (NL: vijzel, S: mortel) and grind to powder

step 2
* cut 6 tomatoes in 4 quarters, cut the seeds out and cut the tomatoes in dices
* cut the cucumber in half, scoop the seeds out with a teaspoon and cut the cucumber in dices
* finely dice the red onion and cut the paprika in dices
* put all this in a serving bowl

step 3
* chop a handful of parsley
* put parsley, ground cumin, 4 tablespoons lemon juice and 100 ml olive together in a bowl
* stir thoroughly
* pour the dressing over the vegetables and mix well
* add salt and pepper to taste

You can serve this salad as a side dish to accompany grilled fish or meat, or with couscous. It's also nice to serve as a starter together with some bread, or as part of some various 'mezzes' (small dishes).

Friday, April 17, 2009

Feta cream / hummus

Back to my Moroccan plate. You got the couscous recipe earlier and now I will let you in on the sauces. A thick cream of feta, a nutty and earthy hummus and some harissa form the ideal company to some couscous or serve well as a dip with other dishes.


Harissa is a hot North African sauce made of chillies and garlic. In Morocco it's served with couscous and other food. I found it in the regular supermarket, otherwise a North African store will have it. You can substitute it by sambal, or hot ajwar.


Feta cream (half bowl)

The feta cream is made by mixing 100 g of feta with a few tablespoons of Turkish yogurt. Put it together in a bowl and mix into an almost smooth paste with a fork.

About the feta: there is feta and there is feta. Feta should be made of sheep and/or goat milk, but definitely not of cow milk. Check the ingredients. Real feta might be a bit more expensive, but there is such a big difference between the real feta and the fake, that it's worth paying a little bit extra.
Turkish yogurt is almost like mascarpone: it's very thick and creamy. Can be substituted by ordinary full fat, thick yogurt.

And then the hummus. I tried making hummus with my handheld mixer (NL: staafmixer) but that didn't work. My mixer is not very strong though, so you could try it and maybe it works. I have a little food processor that is more like a small chopping machine that did the trick (wish I had a real machine though..)


Hummus (makes a full bowl)

1 can chickpeas (400 g) (NL:kikkererwten, S: kikärtor)
juice of 1/2 small lemon
3 tablespoons tahin (sesamepaste)
2 cloves garlic, finely chopped
8-10 tablespoons of olive oil
3-4 tablespoons of liquid from the chickpeas

* place all the ingredients in the mixer bowl
* mix it
* stir and mix again
* repeat until it has become a smooth paste, add more olive oil/liquid if necessary
* drizzle a little olive oil on top before serving, or some paprika powder

If you have the time: make the hummus a day in advance. That way the flavours work together to get an even better tasting substance.

The hummus and feta cream also serve very nicely as a snack, with for example some toasted pita breads or sliced red bell peppers and sticks of cucumber.

Spicy muffins

After eating lunch, I didn't feel quite ready to face the computer and books again and I really felt like eating something 'lekker' (tasty/delicious). Desperately rummaging through my cupboards and fridge, I ended up with flour, sugar, one egg, a little bit of butter and some cream. Hmmm...
Flipping trough an old cookbook I came across this recipe for cardamom muffins. Yippee, it fitted exactly with what ingredients I had on hand.


Cardamom is a favourite spice here in Sweden: the famous kanelbullar have some cardamom in it, so do 'semlor' and you even have cardamom cakes and buns.
But cardamom is not every one's favourite. A visiting friend thought they had put black pepper in her cake! She refused to eat it.
I agree that too much cardamom is no good, so I took a little less cardamom than the original recipe requires, and replaced it with some cinnamon.

Cardamom muffins (cupcake size)
(12 pieces)

50 g melted butter (original recipe requires margarine, but I think that's all wrong)
paper cups + little butter for greasing
1 egg
130 g sugar
120 g flour
1 teaspoon baking powder
1/2 teaspoon cardamom
1/2 teaspoon cinnamon
1 dl cream (NL: slagroom, S: vispgrädde)

* grease the bottom of the paper cups lightly
* preheat the oven to 170 C
* melt the butter: put it in the microwave on 450 watt for 1,5-2 minutes
* mix 1 egg with 1,5 dl sugar until it's white and foamy with a whisk (NL: garde)
* add half of the flour (60 g) and stir it in with a wooden spoon
* add 1 dl cream, stir
* add rest of the flour (60 g) with 1/2 teaspoon cardamon and 1/2 teaspoon cinnamon, stir
(don't stir too much: with muffins it is better to leave some lumps in the batter, even if it seems strange)
* add 50 g melted butter, that has cooled down a little bit and stir shortly, just so it's mixed
* put one big tablespoon of batter (NL: beslag, S: smet) in each paper cup, dividing it equally. it's best if the cups don't become too full
* place in the oven for 15 minutes

I think these fluffy cakes or muffins are really nice. A little bit spicy and not too heavy. Happy that I found the recipe in Mildas bästa recept from 1976!

EDIT: keep your muffins in a airtight container (NL: koekjestrommel, wat een leuk woord) and two days later they still taste great! The texture becomes a bit more dense, which is also quite nice.

Thursday, April 16, 2009

Oven-steamed couscous

You should have smelt my kitchen just now. Roasted cumin seeds, fresh lemon, sesame paste, honey... This Swedish little house had some Morocco in it tonight!
I made myself a plateful of delicacies. Some steamed couscous with prunes and raisins, a fresh salad of tomato, cucumber and roasted cumin, a dollop of feta cream and homemade hummus and oh so spicy harissa.


I will give you all the recipes, but I will spread it out a bit over the days. That way you might come back again!
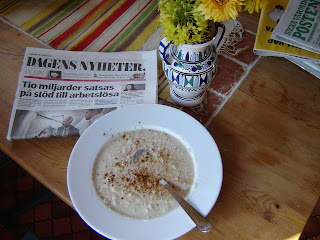
Let's start with the steamed couscous.

Oven-steamed couscous (4 portions)

5 dl water
1 cube of vegetable or chicken bouillon
1 teaspoon ground cumin (for this dish I use ready grounded cumin / NL: gemalen komijn)
1 teaspoon harissa (substitute: 1/2 teaspoon sambal oelek)
1 big teaspoon honey
2 big teaspoons butter
4 dl couscous
handful of dried prunes (8-10 pieces), chopped
handful of raisins
1/2 lemon in thin slices

* preheat the oven to 200 C
* bring 5 dl water to the boil with 1 cube of vegetable or chicken bouillon
* stir in 1/2 teaspoon of ground cumin, 1 teaspoon of harissa, 1 big teaspoon of honey and 2 teaspoons of butter and let that melt
* in the meantime: put 4 dl of couscous in an ovenproof dish (something you would make lasagna in)
* chop up a handful of prunes and add to the couscous, together with a handful of raisins
* pour the bouillon mixture over the couscous and place the lemon on top
* cover with alumiumfoil and place in the oven for 15 minutes

Variations: use apricots and/or dates; add some almonds or a chopped shallot et cetera. This couscous is also very nice with some grilled fish or lamb. You can also use bulgur instead of couscous, but check if it's fine or course. The course bulgur might need a bit more time and some more bouillon.

Wednesday, April 15, 2009

Oatmeal porridge - havermoutpap

I like rituals, especially in the morning. I get up, do some yoga (started that a while ago, and it feels so great), put on the kettle and walk to the mailbox. Get the newspaper, listen to the excited birds and breathe in the fresh Swedish air. Make some porridge and just sit there, in my kitchen, reading the paper. Often the best time of the day!


A bowl of warm, creamy porridge can really make me happy. Growing up I always started my day with Brinta, the most common Dutch variety of porridge. We usually ate the porridge with brown caster sugar, that melted when you stirred it in...yummy!
I didn't eat porridge for years, and last year I had a sudden craving. In the supermarkets here there is no Brinta to be found and it's closest resemblance had ingredients like dried milk powder. Why!? I just wanted a bowl of healthy, pure porridge.
I decided to try and make oatmeal porridge instead. I heard it's really healthy and it seemed worth the try. I was so pleasantly surprised! Since then I have been eating porridge for breakfast nearly every morning, especially in the winter. It's fast, fills you up and warms you from the inside. Plus, you don't get hungry until lunch.
I know it's getting warmer outside, but I can still not part with my porridge breakfast. Maybe you feel like trying some, but you don't really know how to go about it. It's very simple! The packaging of the oats usually have an instruction, but here is how I like to make it:


* Take 5 tablespoons of oats (havermout) and mix with some milk. I use oatmeal milk (Oatly), which is available in all the shops here in Sweden. I don't like to drink too much cow milk, and I heard that drinking soy milk too often is not so good either. I also think that Oatly milk gives a sweet flavouring and a creamy texture - but try it with any kind of milk.
* place your bowl in the microwave, and heat for 2 minutes on 750 watt
* stir (I leave the bowl in the microwave while stirring)
* heat again for 2 minutes
* pour in some cold milk until you find the consistency you like
* choose your topping. this morning I used some sweetener and cinnamon, but I also like to put in some lingonberry jam or brown sugar/muscovado sugar
* eat and be warm and happy!

Very nice to go with your porridge, or instead, or later in the day: a creamy superhealthy smoothie. Mix one banana, one pear (unpeeled!), 200 ml orange juice (= one big glass) and 3 tablespoons of Turkish yoghurt in a blender or with a handheld mixer. This is enough for two big glasses.

Tuesday, April 14, 2009

Chewy meringue cookies

I have been trying to make the perfect meringue cookie for a while now and finally I had some success! These cookies have a marshmellow like texture in the middle and are crunchy on the outside. Very nice to eat the way they are, or you can use them in a dessert with some ice cream and fruit.

Last Sunday I made a nice spaghetti carbonara- the recipe will follow later. Anyway, I had some egg whites left over. While studying for my thesis I decided to turn those egg whites into something tasty. This is what I did:


Chewy meringue cookies
(18-25 cookies)

4 egg whites
1 lemon (not necessary)
150 g icing sugar (NL: poedersuiker)
1 teaspoon cornflour (NL: maizena)
1 teaspoon vinegar
100 g finely chopped almonds
little oil or butter
extra: baking sheet (NL: bakpapier)

* split 4 eggs - eggs are easier to split if they are cold from the fridge
* let the whites come to room temperature - or place them in a plastic container (make sure that it's not greasy) in some hot water for 10 minutes
* preheat the oven to 100 C
* take a mixing bowl and whisk (NL: garde) and rub them with some lemon - this is to prevent them from being greasy and gives a slight taste. if you don't have lemon on hand, wash the bowl and whisk with washing up liquid. you can also use an electric mixer.
* beat the egg whites until they are forming peaks
* sieve 150 g icing sugar and 1 teaspoon cornflour and blend with the egg whites and continue to beat
* add 1 small teaspoon vinegar and beat until shiny and thick. you need to be able to turn the bowl upside down (I held it above my head!)
* fold in the 100 g of finely chopped almonds
* place a baking sheet on a baking tray and grease it slightly with some oil
* form little heaps from the egg white mixture using two tablespoons
* place in the oven and leave it there for a loooooong long time, about 1 1/2 hour. when they are dry on the outside take them out and leave to cool on a rack.

Tip: I read somewhere that you can also have the oven on 150 C, place in the cookies, turn the oven off and leave the cookies overnight. I haven't tried that yet!